
Last Updated: October 28, 2026
Quick Summary
To organize a large photo collection, pick one simple method you'll keep using (year folders with event folders inside work for most families) and gather every photo from every device into one place before you sort. Then remove duplicates and back everything up using the 3-2-1 rule.
- Sort by date taken, not upload date. Upload dates change when files move between phones.
- Run an exact-duplicate pass first, then compare near-duplicates one event at a time and keep the sharpest frame.
- Name important files date first, like 2026-07-04_BeachTrip_014, so they sort in order.
- The 3-2-1 rule means three copies, on two types of storage, with one kept off-site.
- Once a quarter, restore a random folder from your backup to check that it works.
Table of contents
- Start with a photo organization method that fits your life
- How to organize photos by date
- Gather every photo from every device
- How to remove duplicate photos and keep the best shots
- Photo file naming conventions that make sense
- How to back up digital photos
- Organize printed photos and physical albums
- Turn your best photos into fridge magnets
- Frequently asked questions
Start with a photo organization method that fits your life
Organizing thousands of photos starts with choosing one method and sticking to it. The best method is the one you'll keep up. Pick one of these:
- By date: a folder for each year, then each month. Quick, and most of it happens automatically.
- By event: "Beach Trip," "First Day of School," "Grandma's Birthday." Easy to browse.
- Hybrid: year folders with named event folders inside. This is our pick for most families.
Your method is just the rule you use to decide where each picture goes. If the rule is short enough to remember, you'll stay consistent.
For a closer look at the options, our guide on the best ways to organize your digital photo library walks through the trade-offs.
How to organize photos by date
Most phones and computers already store a "date taken" stamp on every image, so you can let the files sort themselves:
- Open your photo app and sort by "date taken," not upload date.
- Create one folder per year.
- Inside each year, add a folder per month.
- Move whole batches at once instead of one photo at a time.
Upload dates aren't reliable. A photo from a 2019 vacation can show a 2024 upload date if you moved it to a new phone. The date taken keeps your timeline accurate.
Most apps let you select a month of photos in a few taps. If you do one year per sitting, you can get through a large collection in a few evenings.
Gather every photo from every device
Photos end up on old phones, in email attachments, on memory cards, and in cloud accounts you forgot you had. Start by listing every place yours might be:
- Your current phone
- Old phones in a drawer
- Laptops and desktop computers
- Memory cards and USB drives
- Cloud accounts and online storage
- Shared family albums and messaging apps
Copy everything onto one main drive first. This is your "inbox" of unsorted photos. Don't organize anything yet.
If you sort while you gather, you end up with half-finished folders and lost files, so collect everything first and sort second. Once it's all in one folder, you'll know how big your collection is, and that helps you plan the rest.
How to remove duplicate photos and keep the best shots
Most duplicates come from burst shots, screenshots, and re-saved images. Sorting by date makes bursts easy to spot.
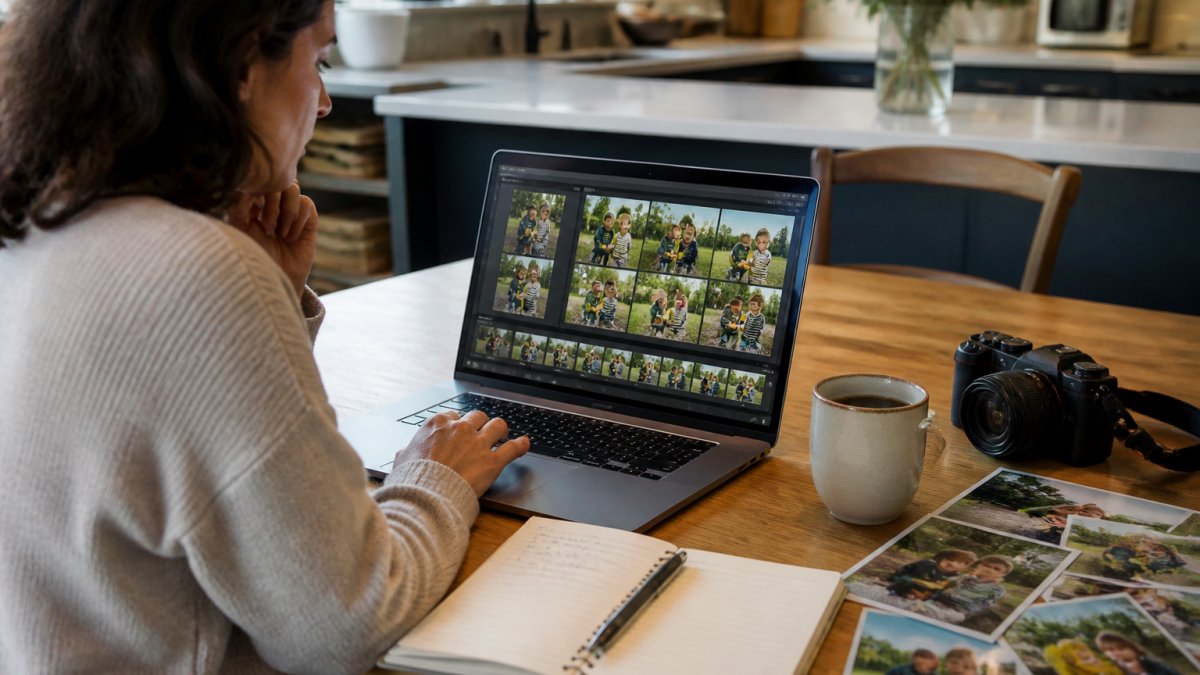
With thousands of files, checking by eye alone takes too long. This routine works for large libraries:
- Run an exact-duplicate pass first. Use your photo app's duplicate finder or a desktop tool that compares file contents. Keep the oldest copy (the original) and remove later copies. Exact duplicates contain identical data, so this pass is safe to automate.
- Then handle near-duplicates by event. Sort by date, open one event at a time, and compare frames side by side. Keep the sharpest, best-exposed frame. Delete the rest only after you've checked that the keeper opens correctly.
- Deal with screenshots and re-saves separately. Screenshots often duplicate a photo you already have, and images sent through messaging apps are usually lower resolution. Keep the highest-resolution version and delete the compressed copy.
- Hold files before deleting. Move candidates to a "Duplicates, Review" folder instead of the trash. Wait a week, spot-check a few, then delete. That way a tool that mistakes two similar smiles for the same shot can't cost you a photo.
Before you remove anything, make sure the keeper is the version you'd print: in focus, with the right color, and the largest file in the group. A sharp 12-megapixel original is better than a soft 3-megapixel re-save, even if the re-save has a nicer file name.
Keep a "maybe" folder for photos you can't decide on and look at it again in a month. You'll probably delete many of them.
Photo file naming conventions that make sense
Put the date first, then a short description, so files sort in order and you can tell what they are at a glance. Use a simple pattern:
- YYYY-MM-DD_Event_Number
- Example: 2026-07-04_BeachTrip_014
Computers sort file names alphabetically, so with the year at the front, your files line up by date. "IMG_4821" says nothing about the photo, while "2026-07-04_BeachTrip" tells you when and where.
A few naming rules:
- Use hyphens or underscores, never spaces.
- Skip special characters that break on some systems.
- Keep names short but clear.
- Use the same pattern in every folder.
You don't need to rename every file. Rename the important ones (events, holidays, milestones) and let everyday snapshots keep their original names.
How to back up digital photos
A backup only counts if the copy is in a second place. The 3-2-1 rule gives you three copies:
- Copy one: your main computer or phone.
- Copy two: an external hard drive at home.
- Copy three: cloud storage or a drive kept somewhere else.
The Federal Trade Commission's guidance on backing up your data makes the same point: keep copies separate so one failure can't wipe everything.
Then test a restore now and then, because a backup you've never restored might not work when you need it.
Keep older versions too. If you edit a photo and save over the original, a simple mirror backup will replace the good copy with the edited one. Use a backup tool that keeps versions, or keep an "Originals" folder that you never edit. Cloud services often keep deleted and previous versions for a limited time. Check how long yours does, because that's how long you have to undo a mistake.
If something does go wrong, work through four steps:
- Spot it: know the signs of failure, such as a drive that clicks, a cloud account that locks you out, or a phone that won't sync.
- Stop using it: stop writing to the failing drive right away so you don't overwrite files that could still be recovered.
- Restore: copy from your second or third backup to a new drive, then open a sample of files to check them.
- Write it down: keep a note of where each copy lives and how to get to it, including account recovery codes stored somewhere other than the cloud account itself.
Cloud storage only counts as a backup if it syncs automatically. If you upload once and forget, new photos never get there.
Set a monthly reminder to update your backup: plug in the drive, let it sync, and unplug it. Here's the whole plan in one table.
| Copy | Where it lives | Note |
|---|---|---|
| Copy one | Main computer or phone | Your working library |
| Copy two | External hard drive at home | Second type of storage |
| Copy three | Cloud storage or off-site drive | Kept somewhere else |
| Restore test | Random folder copied back | Once a quarter |
| Backup update | Plug in drive and sync | Once a month, about ten minutes |
Organize printed photos and physical albums
Printed photos work the same way: sort first, then store. Start by gathering every loose print, envelope, and shoebox into one spot.
A simple system for prints:
- Sort into piles by year or event.
- Write names and dates on the back of each photo.
- Store them in archival boxes or albums, away from heat and light.
- Scan the ones you want to keep digitally.
Labeling the back is the most important step, because names and dates are the first things people forget.
For a full walkthrough on sorting prints and albums, see our tips for organizing family photo albums.
Once your prints are sorted, scan the best ones. A phone scanning app is fine for quick copies, and a flatbed scanner gives sharper results for the photos you care about most.
Turn your best photos into fridge magnets
Once your photos are organized, put a few of your favorites where you'll see them every day.
Pick the photos you kept and choose glossy metal magnets or a puzzle magnet. Add a plastic frame ($9.89, black or white) if you want a border on a 2" x 2" magnet. Orders ship in 3-5 business days.
For printing and displaying those photos, our step-by-step guide to printing photos for the fridge pairs well with our easy steps for displaying family photos on the fridge. For more keepsake ideas, see how to turn digital photos into physical keepsakes.
We kept the ordering process simple on purpose. You've already done the hard part.
Frequently asked questions
What is the best way to organize thousands of photos?
Gather all your photos in one place, then sort them by date or event into folders or albums. Next, remove duplicates, rename important files with a consistent pattern, and set up a backup. For printed photos, use archival boxes labeled by year or event.
How do I remove duplicate photos from my phone?
Use your phone's built-in duplicate tool or a duplicate finder app. On many phones you can sort by date and delete duplicates by hand, and the 'Recently Deleted' folder lets you recover mistakes. For large collections, photo-management software can scan for identical or similar images. Back up before deleting anything, and keep the highest-quality version of each photo.
How should I back up a large photo collection?
Follow the 3-2-1 rule: three copies of your photos, on two different types of storage, with one copy off-site. An external hard drive works for the local backup and a cloud service for the off-site copy. Back up on a schedule, and restore a few files now and then to make sure it works. Store physical prints in archival boxes in a cool, dry place.
How do I choose which photos to print or display?
Choose photos tied to a specific memory, like a family vacation or a child's milestone, and mix group shots, candid moments, and close-ups. To display them, you can turn your favorites into custom fridge magnets from Magnet Stars.
Once your photos are sorted, pull a few favorites out of the camera roll and put them on the fridge where the whole family sees them. Order today and turn them into glossy metal or puzzle fridge magnets. They ship in 3-5 business days.
