
Table of Contents
- Step 1: Choose and Prepare Your Photos Before Anything Goes Up
- Step 2: Pick Your Display Method: Custom Photo Magnets for Refrigerator Decor
- Step 3: How to Arrange Photos on Fridge Without Clutter
- Step 4: Add Magnetic Photo Frames for Fridge for a Finished Look
- Step 5: Protect Your Fridge Surface and Your Photos
- Step 6: Rotate and Refresh Your Display Without Starting Over
- Common Mistakes to Avoid When Displaying Family Photos on Fridge
- Conclusion
- Frequently Asked Questions
Last Updated: September 20, 2026
Step 1: Choose and Prepare Your Photos Before Anything Goes Up
The hardest part of displaying family photos on fridge space isn't arranging, it's choosing. Most parents have thousands of phone pictures and no system for picking the ten that make the door.
Selecting Photos From a Large Digital Library
Open your camera roll and favorite anything from the past year that makes you stop scrolling. Aim for 15 to 20 candidates, then cut that in half.
A few quick rules that make the cut easier:
- Pick faces over scenery. A blurry smile beats a sharp sunset.
- Skip near-duplicates. You don't need four versions of the same birthday candle moment.
- Grab one or two "ordinary day" shots. Those age better than you'd expect.
- Match the season. A summer beach photo lands differently in January.
Printing and Cropping for Fridge Display
Print size matters.
When ordering custom photo magnets for refrigerator decor, use the cropping tool: center the face, leave breathing room at the edges, and check the subject isn't cut off at the chin or forehead. A few seconds here saves a reorder.

Step 2: Pick Your Display Method: Custom Photo Magnets for Refrigerator Decor
Your method decides how the display looks and lasts. Custom photo magnets are cleanest: they hold firm, sit flat, and leave no tape residue.
Here's how the main options compare:
| Method | Look | Surface Safety | Reusable |
|---|---|---|---|
| Custom photo magnets | Clean, flat, framed edge | No adhesive, no residue | Yes, move anytime |
| Adhesive frames | Framed look | Can leave sticky marks | No, one-time stick |
| Tape or putty | Casual, uneven | Risky on finishes | No |
| Magnetic clips | Holds loose prints | Safe on steel | Yes |
Step 3: How to Arrange Photos on Fridge Without Clutter
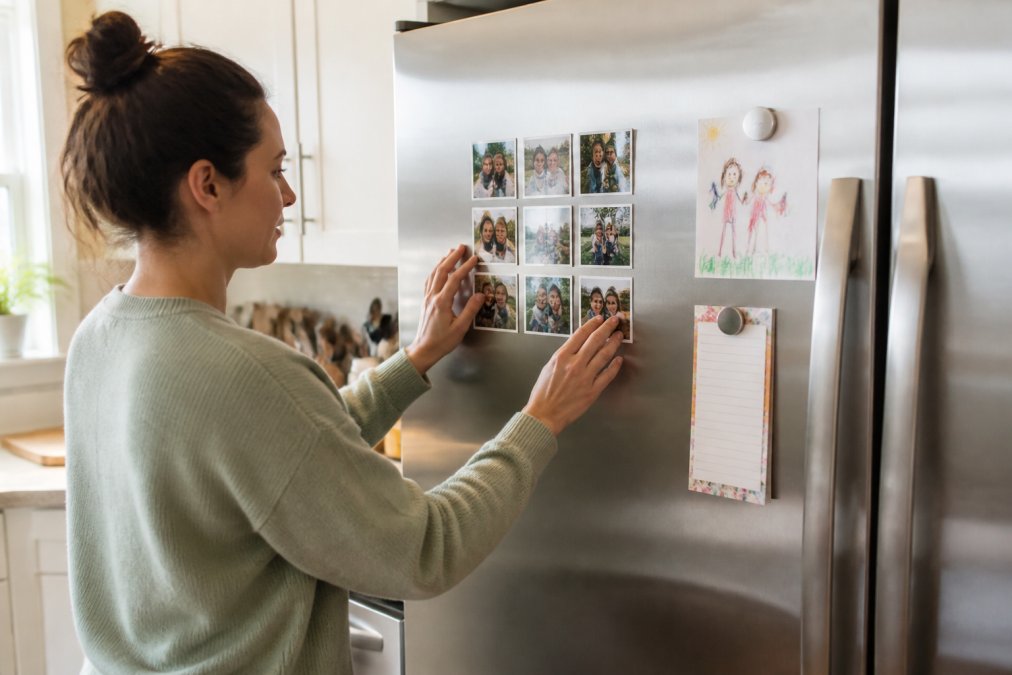
Clutter comes from spacing and placement, not quantity. Twelve photos in a tight grid look calmer than six scattered at random angles, the difference is math, not taste.
Map the Door Before You Place a Single Magnet
A refrigerator door is not one flat canvas. It has functional zones, and treating them the same is what makes displays feel messy:
- The hinge side (left or right, depending on your model): the safest zone for a dense grid, because the door swings away from traffic and nothing gets knocked loose.
- The handle side: reserve this for one or two "hero" photos or a magnetic frame, since hands pass here constantly and dense clusters get disturbed.
- The top third: best for a timeline row or a single large statement piece, because it sits above eye level and reads as a header.
- The bottom third: the practical zone. Grocery lists, takeout menus, and one or two kid-height photos work here because children can actually reach them.
Measure your usable door area first.
The Spacing Math That Kills Clutter
A display reads as "designed" when gaps are consistent and roughly one-quarter to one-third of the magnet's width. For a 2" x 2" magnet, that's a 1/2-inch to 3/4-inch gap in a tight grid, or 1 to 1.5 inches for an airy, gallery-style look.
A quick way to hold the line:
- Pick one gap size and use it everywhere in a single cluster.
- Align tops and bottoms, not just left edges. Crooked rows are the number-one source of visual noise.
- Keep the outer border of the cluster at least 2 inches from the door's edge so the layout has a margin.
- If a magnet doesn't fit the grid without breaking the gap, it belongs in a different cluster.
Grid Layouts, Timeline Order, and Theme Groupings
Three arrangements cover nearly everything:
- Grid layout: Equal spacing, same-size magnets, calm and modern. Best for a 3x3 or 4x3 block of 2" x 2" squares. This is the layout that survives the most photos without looking busy.
- Timeline order: Oldest at the top left, newest at the bottom right. Great for watching kids grow. Keep it to a single row or a single column so the eye can follow the progression; a two-dimensional timeline gets confusing fast.
- Theme groupings: One cluster for vacations, one for grandparents, one for everyday moments. Separate clusters by at least 3 to 4 inches so each reads as its own unit rather than one big blob.
Pick one system and commit, mixing all three creates visual noise.
Minimalist vs. Maximalist: Match the Display to Your Kitchen
For a minimalist kitchen (flat-panel cabinets, stainless or integrated appliances, limited color):
-
Cap the display at 4 to 6 magnets.
-
Use one size only, preferably 2.5" x 2.5" or larger, so each photo carries weight.
-
Choose a single row or a 2x2 block, centered on the door.
-
Let the fridge finish show. Negative space is the design.
-
A 4x4 grid of 2" x 2" magnets is comfortable, and you can push to 18 to 20 pieces if the spacing stays strict.
-
Mix in one or two magnetic frames as anchors, then fill around them with unframed squares.
-
Group by theme rather than by date so the clusters tell a story.
For a transitional kitchen (shaker cabinets, mixed metals):
- Split the door into two zones: a tight grid on the hinge side and a looser, larger-format cluster on the handle side.
- Use black frames on stainless and white frames on white or colored refrigerators so the frames either disappear or pop, never hover in between.
When to Stop Adding
The honest test: stand in your kitchen doorway and look from 10 feet away. If you can't tell where one cluster ends and the next begins, remove two or three pieces and re-check. Most people's ceiling is lower than expected.
Step 4: Add Magnetic Photo Frames for Fridge for a Finished Look
Magnetic photo frames for fridge displays turn a loose magnet into something deliberate: a crisp border, hidden rough edges, and a small photo that feels like a real framed print.

Step 5: Protect Your Fridge Surface and Your Photos
Fridge doors scratch and prints fade, and both are preventable. This separates a display that looks good for a month from one that lasts years.
Protecting the Finish: What Actually Damages a Refrigerator Door
A safe routine for all of them:
- Wipe the door with a soft microfiber cloth and plain water or a manufacturer-approved cleaner. Skip abrasive pads and ammonia-based glass cleaners on coated surfaces.
- Let it dry completely. Trapped moisture under a magnet can leave a ring over time.
- Place magnets by lifting and setting, never by sliding. A single grain of grit under a sliding magnet acts like sandpaper.
- Lift magnets straight off when rearranging. No twisting, no dragging.
Preventing Photo Fade: The UV Problem Nobody Mentions
A fridge near a window or skylight gets hours of direct sun daily. UV light breaks down photo dyes, and the damage is cumulative and irreversible, a print in full sun can fade noticeably within a year or two.
What actually helps:
- Rotate on a schedule. Moving photos out of direct sun every few weeks spreads the exposure and dramatically extends their life.
- Keep the display on the shaded side of the door. If your kitchen gets strong afternoon light from one direction, cluster the display on the opposite side.
- Store the originals. Keep the digital file and, for anything irreplaceable, a print stored in an album away from light. The fridge copy is the display, not the archive.
Humidity, Heat, and the Kitchen Environment
A fridge door sits near the stove, dishwasher, and sink, so it sees more temperature swings and moisture than almost any surface in the house. One consequence:
- Adhesives fail faster. Heat and humidity degrade tape and putty, which is another reason magnetic-only methods are the safer long-term choice.
A Simple Maintenance Rhythm
- Weekly: Wipe the door with a dry microfiber cloth when you clean the kitchen.
- Monthly: Rotate two or three photos out of any sun-exposed spot.
- Seasonally: Check for edge curling or fading and replace anything that's starting to look tired.
- Annually: Do a full audit. Retire the faded prints, store them, and refresh the display.
Step 6: Rotate and Refresh Your Display Without Starting Over
A display that never changes stops being noticed, but refreshing takes minutes, not an afternoon.
Here's a simple rotation rhythm:
- Monthly: Swap two or three photos for newer ones.
- Seasonally: Change the whole grid to match the time of year.
- Annually: Pull the oldest photos and store them, then start a fresh set.
Common Mistakes to Avoid When Displaying Family Photos on Fridge
Most disappointing fridge displays fail for the same handful of reasons. Fix these and yours will beat most.
- Too many photos at once. More than about a dozen magnets on one door starts to feel busy.
- Mixed sizes with no plan. Random sizing breaks the grid and creates uneven gaps.
- Cropping faces too tight. Leave space above the head so the print doesn't feel cramped.
- Ignoring the fridge finish. Adhesives damage stainless steel; magnets don't.
- Never rotating. A static display becomes invisible within weeks.
- Skipping the frame. Unframed magnets look unfinished next to framed ones in the same grid.
Conclusion
A display you love comes down to three things: fewer photos, a method that protects your fridge, and refreshing before it fades into the background.
Frequently Asked Questions
How do I display family photos on fridge without damaging the surface?
Magnets are the safest option for any fridge finish, including stainless steel. They lift off cleanly and leave no residue. If you want a framed look, use magnetic photo frames for fridge that snap open and hold the photo with built-in magnetic backing. That way nothing ever touches the fridge surface except the magnet itself.
What are the best types of magnets for displaying photos on a refrigerator?
Custom photo magnets printed on glossy metal with a strong magnetic backing hold firm and resist peeling or fading. For a polished look, slip a 2 x 2 inch magnet into a plastic magnet frame with a 50 x 50mm opening. Puzzle photo magnets work well for a kids' activity or a standout gift. All three options are rearrangeable, so you can move pieces around without leaving marks or losing hold.
How many photos should I put on the fridge at once?
Aim for 6 to 12 magnets in a defined area rather than covering the whole door. A grid layout of matching sizes reads as intentional; a scattered mix of sizes and shapes reads as clutter. Pick one zone, such as the upper half of the door or a single side panel, and keep the rest of the fridge clear. Rotate a few pieces in and out monthly so the display stays fresh without growing.
Can I use magnetic photo frames on stainless steel appliances?
Yes, as long as the stainless steel is magnetic. Many refrigerators have magnetic steel doors, but some finishes use non-magnetic panels. Test with a simple kitchen magnet first. If it sticks, magnetic photo frames for fridge will hold fine. If it slides off, your door is likely non-magnetic, and you would need a different display surface such as a side panel or a magnetic board.