
Table of contents
- What you'll need to print photos for fridge display
- How to print photos at home for your fridge
- How to make homemade picture magnets
- Finishing and protecting your fridge photo prints
- How to display photos on a stainless steel refrigerator
- DIY vs. professional printing: which is right for you?
- Frequently asked questions
Last Updated: October 7, 2026
What you'll need to print photos for fridge display
You don't need a fancy setup to print photos for the fridge, just a short supply list. The supplies below cover nearly every home printing job.
Here is what you need:
- A computer or phone with your photos on it
- An inkjet printer that handles photo paper
- Photo paper (glossy, matte, or satin, around 200 gsm)
- Peel-and-stick magnetic sheets or pre-cut magnet blanks
- A paper trimmer or sharp scissors, and a ruler
- Optional: clear spray sealant or laminating sheets
Print quality starts with your source photo, so pick sharp, well-lit images before you print anything.
How to print photos at home for your fridge
- Crop each photo to the magnet size you want.
- Load the photo paper printable side up (check your printer's paper diagram).
- In the print dialog, set the paper type and “best” quality.
- Print one test sheet first.
- Let prints dry at least an hour before cutting or handling.
Rushing the drying step smears prints. Give the ink time.
Choosing the right photo paper and printer settings
Photo paper choice changes how your print looks and how long it lasts. Glossy paper gives you vibrant prints with deep color. Matte paper shows fewer fingerprints and handles glare better under kitchen lights.
For printer settings, select "photo" or "best" quality and match the paper type in your printer menu. This tells the printer how much ink to lay down. If you skip this step, colors can look washed out.
Paper weight matters too. Heavier paper, around 200 gsm or more, feeds through printers without curling. Thin paper wrinkles and jams.
- Glossy: best color punch, shows fingerprints
- Matte: softer look, hides smudges
- Satin: middle ground for both
Sizing and formatting your images for fridge magnets
Standard magnet sizes run small, so image sizing matters more than you might think. Our glossy metal magnets come in 2" x 2", 2.5" x 2.5", 2" x 3", and 2.5" x 3.5" sizes. Print your photo at the exact size you plan to display.
Keep the aspect ratio in mind. A square crop fits a square magnet with no wasted space. A tall phone photo on a square magnet gets cropped hard, so check the edges before you print.
How to make homemade picture magnets
- Peel the backing off a magnetic sheet and lay it sticky side up.
- Set the print face up on it, starting at one edge and smoothing toward the other.
- Press firmly and evenly. Air bubbles show through glossy finishes.
- Trim to size with a paper trimmer, cutting through photo and magnet together.
Adhesive compatibility: matching glue to paper weight
Most DIY magnet failures aren't printing failures. They're adhesive failures. A peel-and-stick sheet that holds a 100 gsm matte print will slide off a 250 gsm glossy print within a week, because glossy coatings are slick and heavy stock resists the light tack used on cheap sheets. Match the adhesive to the paper, not the other way around.
Here is how the common combinations behave:
| Paper Type | Best Adhesive | Why It Works | Watch Out For |
|---|---|---|---|
| Lightweight matte (under 150 gsm) | Standard peel-and-stick sheet | Porous surface gives the glue something to bite | Paper can wrinkle if you press too hard |
| Heavy matte (200 gsm and up) | High-tack sheet or spray adhesive | Thicker stock needs a stronger bond to stay flat | Spray adhesive needs 24 hours to fully cure |
| Glossy photo paper | High-tack sheet, or scuff the back with fine sandpaper first | Roughing the back gives the glue a mechanical grip | Weak glue releases in kitchen humidity |
| Satin or pearl finish | High-tack sheet | Semi-porous coating bonds better than full gloss | Test one magnet before running a batch |
A few practical rules that save wasted sheets:
- Test one magnet before a batch. Press a scrap of your chosen paper onto a scrap of magnetic sheet, wait 24 hours, then try to peel it. If it lifts cleanly, the adhesive is too weak for that paper.
- Let spray adhesive off-gas. Aerosol adhesives need 24 hours in a ventilated room before the bond is permanent. Pressing and sticking right away leads to bubbles later.
- Avoid glue sticks and white school glue. They are water-based, and the moisture warps photo paper and weakens the magnet bond.
- Clean the magnet side too. Dust on the magnetic face reduces holding power on the fridge, even when the photo side is perfect.
Magnetic sheet options
Magnetic sheets come in three main types, and each has a different best use:
| Sheet Type | Best For | Watch Out For |
|---|---|---|
| Peel-and-stick sheets | Quick home projects | Weak glue on glossy paper |
| Pre-cut magnet blanks | Clean edges, no trimming | Sizing limits |
| Magnetic frames | Framed, finished look | Need a magnet inside |
For a polished result, our plastic magnet frames hold a 2" x 2" photo magnet behind a clear panel. The frame snaps open, so you can swap photos whenever you want a change.
Finishing and protecting your fridge photo prints
A protective layer keeps your print from fading, peeling, or bending. Home prints face kitchen heat, steam, and sunlight, so a little protection goes a long way. The wrong choice, though, can yellow a print faster than no coating at all.
Why fridge prints fade
Inkjet prints fade for two reasons: UV light breaks down the dye molecules in the ink, and airborne moisture plus kitchen grease slowly degrades the paper coating. On a fridge, both happen constantly. A door near a window can receive several hours of indirect sunlight a day, and every time the door opens, warm humid air hits the print. That combination is why a magnet that looks perfect in month one can look washed out by month eight.
Pigment-based inks resist fading far better than dye-based inks. Most home inkjet printers use dye inks for color, which is why a protective layer matters more for home prints than for lab prints.
Custom Photo Fridge Magnets – Glossy Metal →
Protection options, ranked by durability
| Method | Fade Resistance | Moisture Resistance | Best For |
|---|---|---|---|
| Clear spray sealant for inkjet prints | Moderate | Moderate | Matte prints, quick jobs |
| Self-adhesive laminating sheet | High | High | Glossy prints, handled magnets |
| Magnetic frame with clear front panel | High | High | Photos you plan to swap |
| No coating | Low | Low | Disposable or short-term displays |
Lamination adds a protective layer that resists moisture and smudges. Spray sealant works well for matte prints and dries fast, but it needs two or three thin coats, not one heavy coat. A heavy coat pools and clouds the image. Frames give you protection plus a finished edge, and they are the only option that lets you change the photo without reprinting.

A concrete UV-protection workflow
If you want magnets that still look good a year from now, build the protection in at three points:
- Print with pigment ink if your printer supports it. Check your printer's spec sheet; many photo printers offer a pigment black plus dye color, which already improves fade resistance.
- Seal the print before you cut it. Coat the full sheet, let it cure per the product instructions (usually 24 hours for spray, immediate for laminating film), then cut. Sealing after cutting leaves the edges exposed.
- Choose the display spot deliberately. The side of the fridge away from windows and away from the stove holds color far longer than the door face. If the door is your only option, rotate magnets every few weeks so no single print takes the full UV load.
Eco-friendly alternatives
If material waste matters to you, a few swaps reduce the footprint without hurting durability:
- Recycled photo paper is widely available and prints nearly identically to virgin stock; check that it is labeled compatible with your ink type.
- Reusable magnetic frames beat peel-and-stick sheets for longevity because you reprint only the photo, not the magnet.
- Avoid PVC-based magnetic sheets where you can; look for sheets labeled PVC-free or made with a recyclable backing.
How to display photos on a stainless steel refrigerator
Stainless steel refrigerators often will not hold a standard magnet, because many stainless doors are not magnetic. Before you plan a display, test your fridge with any fridge magnet you already own.

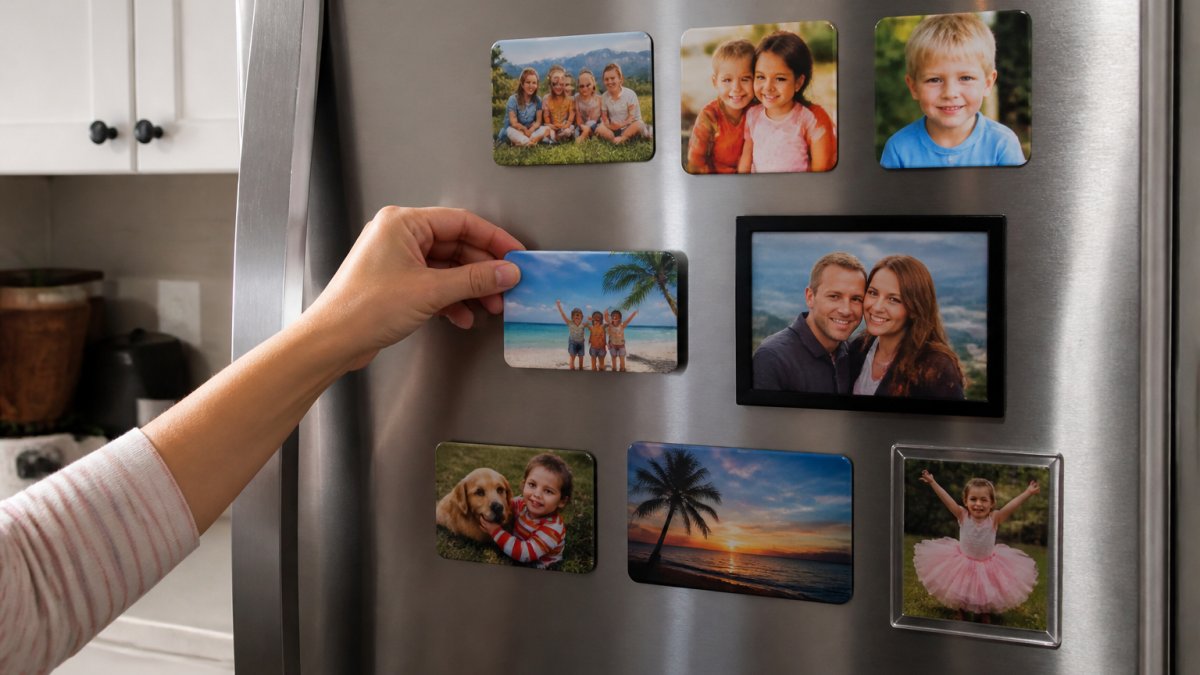
If the magnet slides off, you have a few good options:
- Use the side of the fridge, which is often magnetic
- Add a magnetic board or metal sheet to the wall nearby
- Display on a metal cabinet or filing cabinet
- Use a small magnetic easel on the counter
A neat grid looks best. Pick a focal photo for the center, then build outward with smaller prints. Rotate a new favorite in every few weeks so the display stays fresh.
DIY vs. professional printing: which is right for you?
DIY printing wins on cost and speed for a few magnets. Professional printing wins on durability, color, and consistency for larger batches.
Choose DIY if you want a quick weekend project and only need a handful of magnets. Choose professional printing if you want magnets that last for years, or if you are making gifts in bulk.
Here is how the two compare:
| Factor | DIY Printing | Professional Printing |
|---|---|---|
| Cost per magnet | Low for small batches | Better value in bulk |
| Time | 15-30 minutes per magnet | No work on your end |
| Durability | Depends on your sealant | Built to last, no peeling |
| Color quality | Varies by printer | Vibrant, consistent prints |
| Best for | A few quick magnets | Gifts, events, bulk orders |
For most families, a mix works well: print a few at home for fun, then order the ones you want to keep for years.
At Magnet Stars, our four-step process turns any photo from your camera roll into a custom fridge magnet. Upload a photo, crop it with our tool, pick your size, and we ship it to your door in 3 to 5 business days. Free shipping applies on orders over $50, and bulk orders are welcome for events and gifts.
If you have thousands of photos on your phone, start with the ones that make you smile first. Those are the ones worth printing.
Frequently asked questions
How do I print nice photos at home for my fridge?
Use an inkjet printer with photo paper rated for your printer type, and set the print quality to the highest DPI available. For fridge display, choose paper weight around 200-250 gsm so prints stay flat. Print at 300 DPI minimum for sharp results, and let the ink dry completely before handling. If you plan to turn them into magnets, leave a small border for trimming.
What paper is best for printing photos to display on a fridge?
Glossy photo paper gives vibrant prints and works well behind a protective layer. Matte paper resists fingerprints and glare, which helps on a fridge where people touch prints often. For homemade picture magnets, a heavier paper weight (200 gsm or more) keeps the print from curling when you attach adhesive backing or magnetic sheets.
How do I keep fridge photo prints from curling or fading?
Laminate your prints or apply a clear protective layer to block moisture and UV light, which are the main causes of curling and fading. Avoid placing prints near the stove or dishwasher where heat and steam hit them. If you use magnetic sheets, make sure the adhesive covers the full back of the photo, not just the corners, to prevent lifting.
Can I turn a regular photo print into a fridge magnet?
Yes. For a cleaner finish, you can put a 2" x 2" photo magnet inside a plastic magnet frame. Custom photo magnets from a print service are another option if you want a glossy metal finish and stronger hold without the DIY steps.
Whether you print at home or order custom magnets, the goal is the same: get those hidden photos off your phone and onto your fridge where you actually see them. Magnet Stars makes that easy with glossy metal magnets, plastic frames, and a four-step process that ships in days. Start my order today and give your favorite memories a permanent place to live.