
Table of contents
- What you'll need before you print photos from phone
- Step 1: Print photos from phone to a wireless printer
- Step 2: Use the best photo printing apps for your phone
- Step 3: Printing photos from iPhone to home printer
- Step 4: Select the right photo paper size and finish
- Step 5: How to make photo magnets from phone
- Step 6: Keep your photos private and secure
- Step 7: Avoid these common mistakes when you print photos
- Frequently asked questions
Last Updated: October 4, 2026
What you'll need before you print photos from phone
Most people wait until they want a print to think about quality. That's backwards.
First, check the file. A photo needs enough pixels to look sharp at the size you want. Second, confirm your file format.
A simple rule: if a photo looks slightly soft on your phone screen, it will look worse on paper.
Check your photo resolution and file format
Image resolution is the amount of detail a photo file holds, measured in pixels. More pixels mean a bigger, sharper print. A phone photo usually captures plenty of detail for a standard 4x6 inch print.
Watch for these limits:
- Screenshots and messaging-app images are often compressed and low on detail
- Cropped photos lose pixels, so a tight crop may not print large
- Common file formats like JPEG and HEIC print fine; PNG works for graphics
- Check the aspect ratio before you order, or faces get cut off
Choose your printing method: home, app, or store
There are three paths, and each fits a different moment.
| Method | Best For | Effort | Speed |
|---|---|---|---|
| Home wireless printer | Quick single prints | Medium | Minutes |
| Photo printing app | Batches and gifts | Low | Same day to days |
| Retail store pickup | Large or specialty prints | Low | Same-day pickup |
If you print often, a home inkjet printer pays off over time. If you print rarely, an app or store order makes more sense. For keepsakes you'll display, ordering from a service gives you better paper choices.
Step 1: Print photos from phone to a wireless printer
Wireless printing is the fastest way to get a photo in your hand. You send the file over your local network and the printer handles the rest.
Start by connecting your phone and printer to the same network. Then pick your photo and send the job. It usually takes under a minute once everything is set up.
Connect your phone to the same Wi-Fi network
Both devices must sit on the same network. If your printer is on a guest network and your phone is on the main one, the print job will never arrive.
- Open your phone's Wi-Fi settings and confirm the network name
- On the printer, check the network menu for the same name
- If the printer only supports 2.4 GHz, switch your phone to that band
- Restart the router if the printer keeps dropping off
A print queue that stalls is almost always a network mismatch, not a broken printer.
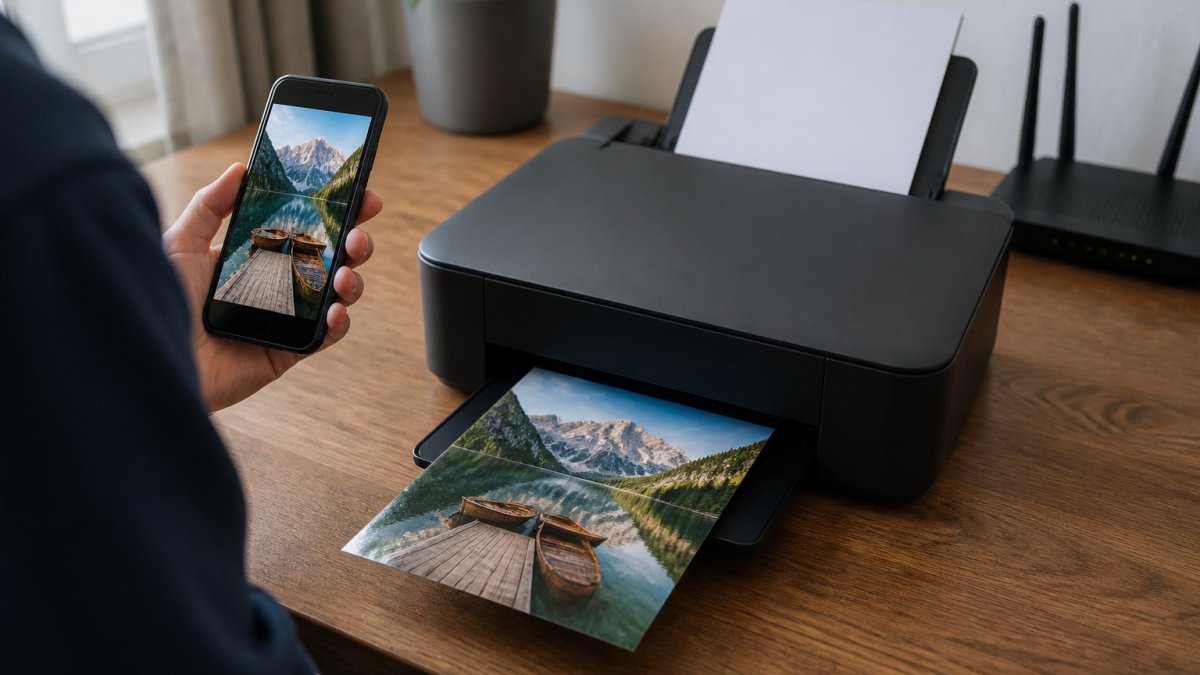
Use AirPrint or your printer's app to send the job
AirPrint is built into iPhones and iPads and lets you print without installing anything. Open the photo, tap the share icon, and choose Print.
If your printer doesn't support AirPrint, use its own mobile application instead. The app gives you more control over print settings like size, copies, and paper type.
Step 2: Use the best photo printing apps for your phone
The best photo printing apps let you order prints and choose paper without leaving your couch. They're built for people who don't want to fight with a home printer.
Most apps work the same way: upload, choose a size, pay, and wait. The difference is in paper options, delivery speed, and how easy the uploading and syncing process feels.
Free apps vs. paid apps: what you get
Free apps cover the basics. You get standard sizes, basic paper, and slower shipping.
Paid apps add:
- Premium paper and finish types
- Larger print sizes and borderless printing
- Faster turnaround and same-day options
- Better tools for cropping and color correction
For a single print, free is fine. For a gift or a batch, the paid tier is usually worth it.
How to order prints for same-day pickup
Same-day pickup is the fastest route when you need prints today. Here's the flow:
- Open the app and select your photos using batch selection
- Choose size, finish, and quantity
- Check the print preview for cropping issues
- Pick a nearby store for pickup
- Confirm and wait for the ready notice
Most stores text you when the order is ready. Bring your order number and you're done.
Step 3: Printing photos from iPhone to home printer
Printing photos from iPhone to home printer is simple once AirPrint is set up. Apple builds the feature into the Photos app, so there's nothing extra to install in most cases.
Open the photo, tap Share, then Print. Choose your printer and adjust the settings before you hit print.
AirPrint setup and troubleshooting
AirPrint needs two things: the same Wi-Fi network and a compatible printer.
If the printer doesn't appear:
- Confirm both devices are on the same network
- Toggle Wi-Fi off and back on
- Restart the printer and the phone
- Update the printer's firmware
Adjust print settings for size, layout, and borderless printing
Tap the print options before you send the job. This is where you control the outcome.
- Size: 4x6 is the standard; 5x7 and 8x10 are common for frames
- Layout: one photo per page, or a grid of smaller images
- Borderless printing: fills the page edge to edge, no white frame
- Copies: set this now to avoid reprinting
Borderless looks better for display, but it can crop a sliver off the edges. Check the print preview first.
Step 4: Select the right photo paper size and finish
Paper choice changes how a photo looks more than most people expect. The same file can look warm and rich on one finish and flat on another.
Pick the size for the frame or surface first, then pick the finish. A paper tray loaded with the wrong size will jam or print off-center.
Glossy vs. matte: which finish lasts longer?
Glossy paper shows deeper colors and sharper detail. It's the classic photo look, but it shows fingerprints and glare under bright light.
Matte paper resists smudges and glare. Colors look softer, and it holds up better on a fridge where hands touch it daily.
For photos you'll handle often, matte is the safer pick. For framed prints behind glass, glossy wins on color.
Cost-per-print: home vs. retail vs. online
Cost-per-print is the number most people forget to calculate. A home printer feels cheap until you add ink and paper.
Retail pickup spreads the cost across many orders, so the per-print price stays low. Online services bundle shipping, which matters most for small orders. For a handful of prints, home wins on speed.
Step 5: How to make photo magnets from phone
Turning a favorite photo into a fridge magnet is one of the easiest ways to get it off your phone and onto your wall.
At Magnet Stars, the process is four steps: pick your photo, upload it, choose your magnet type, and wait for it to arrive.
Pick the best photos for magnets
Not every photo works as a magnet. The best ones have a clear subject and a simple background.
- Close-up faces of kids and grandkids
- A single pet looking at the camera
- A vacation moment with one clear focal point
- A favorite family group shot
Skip busy backgrounds and tiny subjects. A magnet is small, so detail gets lost fast.
Ordering magnets: what to expect
Uploading is simple. Choose your photos, pick a magnet style, and confirm. Orders over $50 ship free, and bulk orders are welcome for events and gifts.
If you're stuck choosing from a huge camera roll, start with the photos you already love. You don't need five thousand. You need five good ones.
Step 6: Keep your photos private and secure
Photo apps ask for a lot of access. Before you upload anything, check what each app can see.
Privacy and data security matter most when you're sending family photos to a service. Read the permissions and know where your files go.
App permissions and cloud storage risks
A photo app may request access to your entire photo gallery, not just the images you select. Some store your uploads on their servers for a set time.
- Grant access to selected photos only, not your full library
- Check whether the app keeps copies after printing
- Review cloud storage settings on your phone
- Turn off auto-sync for sensitive albums
Safe sharing for family prints
When you share prints with family, use a private link instead of a public post. Keep album organization tidy so you know what you've shared and with whom.
For physical prints, label the back with a name and date. Anyone who finds it later will know who's in it.
Step 7: Avoid these common mistakes when you print photos
Small errors cause most bad prints. Fix these before you hit print and your results improve right away.
- Wrong aspect ratio: the photo gets cropped or stretched
- Low resolution: the print looks soft or pixelated
- Wrong paper: glossy for a fridge, or matte for a frame
- Skipping the preview: you miss a bad crop until it's printed
Check resolution, pick the right paper, and preview every job. The harder part is choosing which photos deserve a spot on the fridge. Magnet Stars handles the rest.
Start my order with Magnet Stars and turn your camera roll into keepsakes your family will see every day.
Frequently asked questions
Can I print pictures off my phone at Walmart or Walgreens?
Yes. Both Walmart and Walgreens offer same-day photo printing through their mobile apps or in-store kiosks. You upload your photos from your phone, choose a size and finish, and pick them up within hours. Prices vary by size and quantity, so check the app for current rates. This method works well when you need prints quickly without owning a printer.
What is the easiest way to print photos directly from my phone gallery?
The easiest way is to use your phone's built-in sharing menu. On iPhone, open a photo, tap Share, then Print, and select an AirPrint-compatible printer on the same Wi-Fi network. On Android, tap the three-dot menu and choose Print. If you don't have a printer, apps from retail stores let you upload and order prints in a few taps.
Do I need a special app to print photos from my smartphone?
Not always. Most phones can print directly to a wireless printer without an extra app. But dedicated photo printing apps give you more control over cropping, aspect ratio, and layout. They also let you order prints for pickup or delivery. If you want to print photos from phone regularly, a good app saves time and improves quality.
How do I print photos from my phone to a wireless printer?
First, connect your phone and printer to the same Wi-Fi network. On iPhone, use AirPrint: open the photo, tap Share, then Print, and select your printer. On Android, use the default print service or your printer's app. Adjust print settings like paper size and borderless printing, then tap Print. If the printer doesn't appear, restart both devices and check for firmware updates.