
Table of Contents
- Why Family Photos Deserve a Permanent Spot in Your Home
- Photo Magnets vs Photo Frames Decor: Which Fits Your Space?
- Creative Family Photo Wall Layouts That Actually Work
- How to Arrange Family Photos on a Wall Without the Clutter
- Rental-Friendly and Small-Space Photo Display Ideas
- Making the Jump from Camera Roll to Fridge Door
- Conclusion
- Frequently Asked Questions
Last Updated: September 27, 2026
Why Family Photos Deserve a Permanent Spot in Your Home
Most of us carry thousands of photos and display almost none. Unique photo decor for family homes starts with treating your camera roll as wall art, not a storage bin.
Photo Magnets vs Photo Frames Decor: Which Fits Your Space?
Photo magnets and framed photo decor solve different problems. Magnets win on flexibility and cost; frames win on formality and scale. The right choice depends on your wall, budget, and how often you swap images.
When Magnets Win
Magnets win when your surface is metal. Refrigerators, lockers, filing cabinets, and magnetic boards work instantly, with no drilling or mounting hardware.
When Frames Win
Frames win for large-scale statement pieces. A 16" x 20" framed family portrait commands a hallway in a way no magnet can.
| Factor | Photo Magnets | Photo Frames Decor |
|---|---|---|
| Installation | None, sticks to metal | Hooks, nails, anchors |
| Cost to start | $9.89 and up | Higher per piece |
| Swap speed | Seconds | Minutes to hours |
| Best surface | Fridge, locker, metal board | Drywall, plaster, wood |
| Rental friendly | Yes | Often no |
Creative Family Photo Wall Layouts That Actually Work
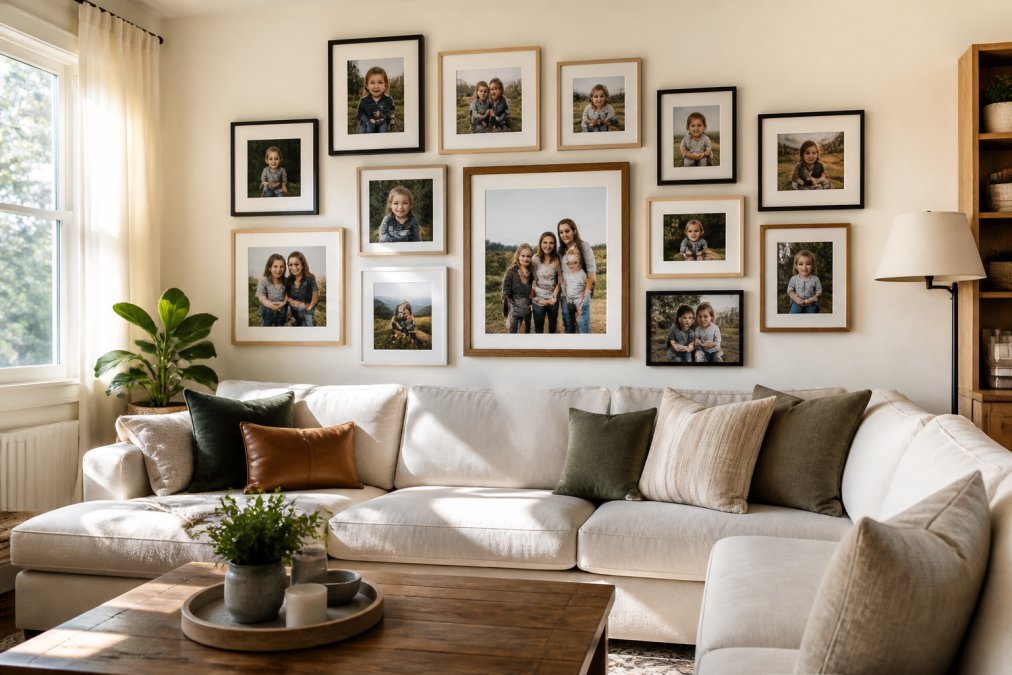
The Grid
The grid is safest and easiest to get right: identical frame sizes, equal gaps of 2 to 3 inches, every edge aligned.
The Salon Wall
The salon wall fills an entire wall edge to edge, floor to ceiling, in mixed sizes. It's dramatic and suits a traditional or maximalist home.
The Ledge Shelf
A picture ledge gives you the gallery look without hole-punching. Lean frames against the wall, overlap them slightly, and swap pieces whenever you like.
How to Arrange Family Photos on a Wall Without the Clutter
Knowing how to arrange family photos on a wall comes down to three rules: anchor, limit, and space. Most cluttered displays break at least one. But the rule most guides skip decides whether a wall feels calm or chaotic: where the wall sits in the house.
The Emotional Zoning Angle Nobody Talks About
Photo placement is not just design, it's emotional. The same nine frames can read as warm in one room and heavy in another, because the feeling you want from a space changes what belongs on its walls.
- Entryway and mudroom: high-energy, candid, recent. This is a transition space, so group photos of the people coming and going, first days, last days, the school-year grid. The goal is motion, not nostalgia.
- Living room: mixed candid and posed, larger scale. This is where guests sit, so the display doubles as a family story. One anchor portrait plus supporting candids works better than a uniform grid here.
- Hallway or stairwell: chronological. A single-file column or a stair-step arrangement that moves through time gives the space a narrative and a reason to slow down.
- Bedroom: low-stimulation. Fewer frames, softer subjects, no busy collage. Bedrooms are for rest, and a wall of twenty faces works against that.
- Kitchen and fridge: rotating, informal, kid-facing. This is the one surface where clutter is a feature, not a bug.
The Three Rules, Applied
Anchor first. Choose one large piece or tight cluster as the focal point; everything else supports it. On a wide wall, center the anchor at roughly eye level, about 57 to 60 inches from the floor.
Room-by-Room Quick Reference
| Room | Best layout | Frame count | Swap frequency |
|---|---|---|---|
| Entryway | Vertical column or 2x3 grid | 4-8 | Seasonal |
| Living room | Salon wall or single anchor | 5-12 | Yearly |
| Hallway | Chronological row | 6-10 | Rarely |
| Stairwell | Stair-step diagonal | 8-15 | Rarely |
| Bedroom | 2-3 matched frames | 2-4 | Rarely |
| Kitchen / fridge | Loose grid of magnets | 6-20 | Monthly |
Pre-Hang Checklist
- One clear focal point chosen
- Frame colors limited to two (ideally one)
- Emotional job of the room identified
- Paper templates taped up and photographed from across the room
- Gaps measured at 2-3 inches
- Center of the arrangement at 57-60 inches from the floor
- Lowest frame at least 8 inches above furniture
- Candid and posed shots mixed, not separated
Rental-Friendly and Small-Space Photo Display Ideas
Renters face a real constraint: no holes, no anchors, no patching. The workaround is moving the display onto surfaces you already have, using damage-free hardware most decor guides ignore.
Custom Photo Fridge Magnets – Glossy →
Damage-Free Hanging Methods That Actually Hold
Command strips are the default answer, and they work, but the details matter more than the brand:
- Weight ratings are per strip, not per hook. A 4-pound picture needs two strips rated for 4 pounds each, not one. Read the package rating as a per-strip number and double it.
- Clean the wall first. Rubbing alcohol on a lint-free cloth, then let it dry fully. Dust and kitchen grease are the two most common reasons strips fail.
- Press and hold for 30 seconds, then wait an hour before hanging. The adhesive needs time to bond to the wall before it carries load.
- Remove by pulling the tab straight down, slowly, parallel to the wall. Pulling outward is what takes paint with it.
For anything heavier than a small frame:
- Picture ledges installed with tension-mounted brackets, no, tension rods are for windows. For walls, use a freestanding floor ledge or a leaning ladder shelf instead. Both hold frames without a single hole.
- Over-the-door hooks and door-mounted racks turn a closet or bedroom door into a display surface.
- Tension rods inside a bookcase or cabinet create a hanging rail for clip-mounted prints.
- Magnetic strips mounted inside a cabinet door turn a hidden surface into a rotating gallery.
- Freestanding easels and plate stands on a console table or shelf give you the gallery look with zero wall contact.
Small-Space Strategy: Go Vertical, Go Narrow
In a small space, think vertically and think narrow. A single column of magnets down the side of a fridge uses dead space that nothing else can claim. A narrow wall between two doorways can take a 2x4 grid where a salon wall would overwhelm it.
The Digital-to-Physical Rotation Problem
Here is the gap most rental and small-space guides miss: the display is only as good as the rotation behind it. A wall of photos from 2019 is not decor, it is a time capsule.
A practical system for renters and small-space dwellers:
- Pick a rotation cadence. Monthly for a fridge magnet grid, seasonally for a ledge, yearly for a framed wall.
- Keep a shortlist album on your phone. Every time you take a photo you love, add it to a "Print" album. When rotation day comes, you are choosing from 20, not 20,000.
- Print in batches. Order 6-12 prints at a time so shipping is worth it and you always have a swap ready.
- Store the outgoing prints in a single archival box. Rotated-out photos are not retired, they are on deck.
Making the Jump from Camera Roll to Fridge Door
The hardest part isn't displaying photos. It's choosing which ones to print from a library of thousands.
Conclusion
The photos are already on your phone. The only missing step is getting a few of them onto a surface you walk past every day. Magnet Stars turns that step into a short one: upload, crop, choose, and your order ships in 3 to 5 business days. Start with a Custom Photo Fridge Magnets - Glossy Metal set at $11.49, add Plastic Magnet Photo Frames at $9.89 for a finished edge, and let free shipping over $50 cover the rest.

Frequently Asked Questions
How do I decorate with family photos without making my home look cluttered?
Stick to one focal wall per room and let the rest of the space breathe. Group photos by theme or color so the eye has a clear path, and mix sizes deliberately instead of scattering single frames everywhere. A tight grid of matching frames or a row of photo magnets on the fridge reads as one cohesive display rather than visual noise. Rotate photos seasonally so the arrangement stays fresh without adding more pieces.
Are photo magnets a good alternative to traditional frames?
For renters, small spaces, and anyone who wants to swap photos often, yes. Photo magnets need no nails, no mounting hardware, and no wall damage, and they stick to any iron surface like a fridge, locker, or magnetic board. Custom photo fridge magnets start at $11.49, and plastic magnet frames at $9.89 give them a finished, gallery-style edge. Traditional frames still win for large statement pieces and formal rooms, so many homes use both.
What is the best way to arrange family photos on a wall?
Start with a focal point, usually the largest or most meaningful photo, then build outward in a balanced shape. A grid layout works well for same-size frames, while an asymmetrical salon wall suits mixed sizes and candid shots. Keep 2 to 3 inches between frames so each photo has room to stand alone, and lay the whole arrangement on the floor first to check the spacing before anything goes up.
How can I display family photos in a small space or rental?
Skip the drill. Magnetic surfaces, picture ledges, and leaning shelves let you display photos without permanent changes. A fridge door becomes a rotating gallery with custom photo magnets, and a narrow picture ledge holds framed prints in a single row without eating floor space. Puzzle photo magnets add an interactive option kids can rebuild, which keeps the display changing without any new holes in the wall.