
Last Updated: October 28, 2026
Quick Summary
Plan your memory wall on paper and mark it with painter's tape before you hang anything, with the center of the arrangement 57-60 inches from the floor. Choose 6-12 photos with a shared theme, print them in consistent sizes, and hang one frame at a time, checking the level after each.
- Leave at least 6 inches of empty wall on each side so the arrangement doesn't feel cramped.
- A print needs about 300 pixels per inch at its final size to look sharp.
- Grid layouts use 2-3 inches between same-size frames in even rows.
- Photo magnets stick to steel with no installation. Frames need hooks or nails.
- Check for wiring and pipes before you drill into any wall.
Table of contents
- What you'll need before you start
- Step 1: Choose the wall and plan your layout
- Step 2: Select and print your photos
- How to arrange family photos on a wall
- Photo magnets vs. photo frames: which fits your space?
- Wall-safe hanging methods and mistakes to avoid
- Start small and let it grow
- Frequently asked questions
What you'll need before you start
A memory wall is a display of family photos, keepsakes, and mementos arranged on one wall. Good ones start as a plan on paper, before any nails go in. Gather these supplies first:
- Photos: printed copies of family photos and favorite moments
- Frames or magnets: picture frames, photo magnets, or both
- Painter's tape: for marking your layout on the wall
Step 1: Choose the wall and plan your layout
Pick a wall with good light and not much traffic, somewhere you see every day: above a sofa, along a hallway, or beside the kitchen table.

Measure the wall and set your boundaries
Write down three measurements: wall width, wall height, and the height of any furniture below the display (sofa back, console top, stair rail). Then set a working area:
- Side margins: leave at least 6 inches (about 15 cm) of empty wall on each side.
- Top margin: keep the highest frame at least 6 inches below the ceiling or crown molding.
- Bottom margin: keep the lowest frame 6-10 inches above the furniture so the display doesn't look like it's sitting on the sofa.
Put the vertical center of the arrangement 57-60 inches (about 145-152 cm) from the floor. That's roughly eye level, and it's the height galleries commonly use for artwork.
Find the center line
Measure the full width of the wall, divide by two, and mark the center with a pencil and a level. Build every layout below outward from that line so the display stays balanced, even on an uneven wall.
Pick a template and scale it to your wall
These four layouts cover most rooms. The spacing assumes standard frames, so scale it up or down for larger or smaller walls.
| Template | Best for | Layout | Spacing between frames |
|---|---|---|---|
| Grid | Clean, modern look | Same-size frames in even rows and columns | 2-3 inches (5-8 cm) |
| Salon | Cozy, collected feel | Mixed sizes, tight spacing, filled wall | 1.5-2 inches (4-5 cm) |
| Symmetrical | Formal, centered spaces | Matching pairs around a central anchor | 2-3 inches (5-8 cm) |
| Stair-step | Hallways and stairwells | Frames follow the angle of the stairs | 2-3 inches (5-8 cm), step rise matched to stair pitch |
For a grid, choose the number of columns first (three or four works on most walls), then divide the available width by that number to find each column's center. For a salon wall, start with the largest frame slightly above center and add frames outward in pairs. For a symmetrical layout, put the anchor piece on the center line and mirror each frame on the other side. For a stair-step, run a line of painter's tape parallel to the stairs and keep the center of every frame on it.
Mark the layout with painter's tape
Cut tape rectangles to the outside size of each frame and stick them on the wall where you plan to hang them. Stand back, sit on the sofa, and walk down the hallway to check the balance from different spots. Take a photo of the taped layout to refer to once the tape comes down.
Check the wall before you commit
Run a stud finder with a wire sensor across the area to find studs, wiring, and pipes. Note where the studs are, because heavy frames should go into a stud or use anchors rated for the weight. If the wall is plaster or brick, or you're renting, read the wall-safe hanging section below before you buy hardware.
Step 2: Select and print your photos
Choose 6-12 photos with a shared look or theme, and print them in consistent sizes. Here's how to pick images that look good at print size and keep them looking good on the wall.
Pick photos that hold up at print size
Start with the photos that make you smile, then check them for print quality. Good places to look:
- Family occasions: birthdays, holidays, first days of school
- Everyday moments: quiet mornings, backyard play, Sunday dinners
- Generations: grandparents, grandchildren, old family photographs
Check the resolution before you order. A print needs about 300 pixels per inch (ppi) at its final size, so an 8x10 inch print needs at least 2400 x 3000 pixels and a 4x6 needs about 1200 x 1800. If your file is smaller, print it smaller or expect it to look soft. Screenshots and social-media downloads are usually too compressed to enlarge.
Match print size to frame size
Standard frame sizes (4x6, 5x7, 8x10, and 11x14 inches) keep costs down and make the layout easier to plan. Use one main size for most of the wall, plus one or two larger anchor prints. Keep mat borders consistent. An 8x10 print with a 1.5-2 inch mat in an 11x14 frame is a classic choice.
Choose paper and finish
- Matte paper: less glare and fewer fingerprints. Works well with black frames and in darker rooms.
- Glossy paper: more contrast and brighter color. Works well with white frames and in bright rooms, but shows reflections.
- Luster or satin: in between, and it shows fewer fingerprints than glossy.
Order one test print before the full set. Colors can look different on paper than on screen, and a $1 test print costs less than reprinting a dozen.
Add captions and dates
Captions tell visitors who, where, and when. Write names, place, and year on the back of each print in archival pencil, or put a label or printed caption strip below each frame. Use the same font and size for every caption so they look tidy.
Protect prints from sun and damp
Sunlight and humidity do the most damage to printed photos. Use UV-filtering glass or acrylic on walls that get direct sun, keep prints out of damp rooms like bathrooms, and don't hang them above radiators or vents. Archival paper and pigment-based inks last longer than standard dye prints.
For a cheaper, more flexible option, turn a handful of favorites into custom photo magnets. Our Custom Photo Fridge Magnets start at $3.99 for a single 2" x 2" magnet (or $11.99 for a 4-pack) and ship in 3-5 business days. You can start with a small display on the fridge or a steel board before doing a full wall, and swap photos in and out as your collection grows.
Custom Photo Fridge Magnets – Glossy Metal →

How to arrange family photos on a wall
Start with the largest piece as your anchor and build outward in balanced pairs. The wall doesn't have to be symmetrical, but it should feel even: a heavy frame on one side needs something with similar visual weight on the other. (For a smaller display, see our tips for displaying family photos on the fridge.)
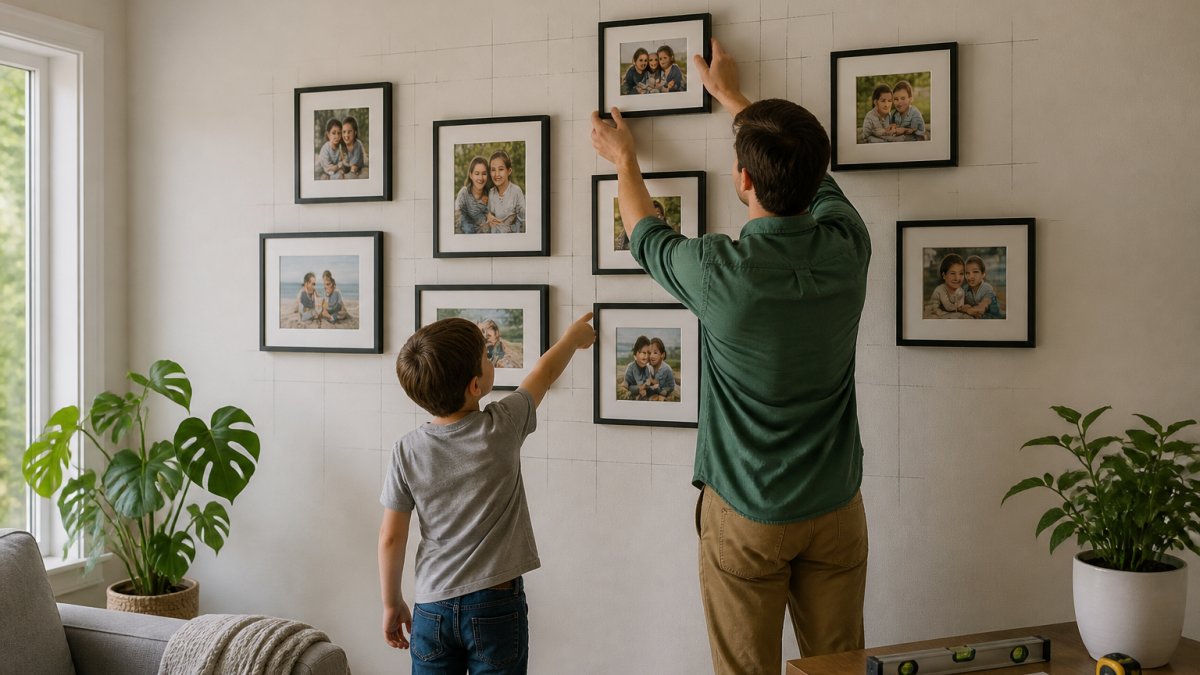
- Place your anchor piece slightly above center.
- Add the next largest frames on opposite sides.
- Fill gaps with smaller photos and keepsakes.
- Step back every few minutes to check the balance.
- Adjust the spacing until the group looks even.
Mix in a few mementos, like a child's drawing, a ticket stub, or a pressed flower, to make the wall feel personal.
Photo magnets vs. photo frames: which fits your space?
Photo magnets cost less and are easier to change. Photo frames give a more formal, finished look.

| Factor | Photo magnets | Photo frames |
|---|---|---|
| Installation | None, sticks to steel | Needs hooks or nails |
| Cost | Lower | Higher |
| Swapping photos | Instant | Requires opening the frame |
| Best surfaces | Fridge, steel boards, lockers | Any wall |
| Look | Casual, cozy | Formal, polished |
| Breakage | No glass to break | Glass can break |
Magnets suit renters, kitchens, and families with young kids. Frames suit living rooms and hallways where you want a bigger display.
You can also combine them. Our Plastic Magnet Photo Frames ($9.89, black or white) fit our 2" x 2" magnets and give them a finished edge.
For something playful, our Puzzle Photo Magnets (from $19.99) turn one photo into a 6- or 9-piece puzzle kids can put back together on the fridge.
Wall-safe hanging methods and mistakes to avoid
Choose your hanging method based on the wall:
- Drywall: picture hooks or self-drilling anchors rated for the frame's weight
- Plaster: adhesive strips for light frames, anchors for heavy ones
- Brick or concrete: masonry anchors or a magnetic display board
Mistakes to avoid:
- Hanging heavy frames with adhesive strips alone
- Skipping the level and placing frames by eye
- Spacing frames so far apart that they stop looking like one group
If you're renting or don't want any holes, a magnetic board or the fridge is the easiest option. You don't need tools, and you can rearrange photos whenever you like.
Start small and let it grow
A memory wall takes an afternoon to put up, and your family will walk past it every day. Start small, plan the layout, and add to the display as your collection grows.
Magnet Stars turns photos from your camera roll into glossy metal and puzzle magnets. Start your order and get a few of those photos out of your phone.
Frequently asked questions
How can I create a gallery wall at home without damaging the walls?
Use removable adhesive strips rated for your frame's weight, or lean lighter pieces on a picture ledge. A memory wall made of photo magnets needs no nails at all: magnets stick to steel surfaces like the fridge, a locker, or an office board, and plastic magnet frames add a border without tools. If you do drill, find the studs first and keep holes inside the frame's outline so any patching later stays small.
What is the best way to arrange photos on a memory wall?
Start with one anchor piece, usually the largest photo, with the center of the arrangement at eye level (about 57 to 60 inches from the floor). Build outward, keeping 2 to 3 inches between frames so they read as one group. Balance dark or heavy pieces against lighter ones, and lay everything out on the floor first. Using one frame color, such as all black or all white, helps mixed sizes look like a set.
How do I mix different frame sizes for a cohesive memory wall?
Pick one frame color and vary only the sizes, or keep the sizes the same and vary the color. Odd numbers of pieces, such as groups of three or five, tend to look balanced, and lining up at least one edge in each group helps. A 3x3 grid works for same-size frames, while a salon-style layout works for mixed sizes. Keep the spacing the same throughout, and repeat one element, like a quote card or keepsake, in a few places.
Can I add keepsakes and non-photo items to a memory wall?
Yes. Ticket stubs, handwritten quotes, fabric swatches, or small mementos between photos make the wall more personal. Keep them to about one in five pieces so the photos stay the focus. On the fridge, a puzzle photo magnet or a framed magnet lets you rotate small keepsakes without putting new holes in the wall.
