
Table of Contents
- Why small apartments need a photo display plan
- How to display digital photos room by room
- Photo display ideas without frames
- How to make a photo gallery wall in a small space
- Photo magnets for fridge decor
- Digital photo frame ideas for small spaces
- Renter-friendly mounting, cables, and setup
- Conclusion
- Frequently asked questions
Last Updated: October 17, 2026
Why small apartments need a photo display plan
If you're wondering how to display digital photos in a small apartment, start with a plan before you buy anything. Small spaces punish clutter and reward intention, so every photo display has to earn its spot on the wall, shelf, or fridge door.
Most people don't need more photos. They need a way to choose a few and decide where they go.
Your phone holds thousands of images, but your apartment holds maybe ten good display spots. That mismatch is why so many digital photo libraries stay buried in the camera roll forever.
A display plan fixes three things at once:
- Curation: you pick the photos worth seeing daily
- Placement: you match each photo to a spot people actually look at
- Rotation: you swap images on a schedule so the display stays fresh
How to display digital photos room by room
Room-by-room placement beats one big display wall in a tight floor plan. Spread your photos across the spaces you actually live in, and each spot stays meaningful instead of becoming wallpaper.
Living room and entryway
The entryway and living room are your highest-traffic viewing areas. A foyer console table with one statement frame or a small digital display greets everyone who walks in. In the living room, a narrow shelf above the sofa can hold three to five framed photos without eating floor space.
Keep the color palette tight. Mixing wood, black, and white frames in one cluster looks intentional; mixing five finishes looks accidental.
Bedroom and kitchen
Bedrooms suit quieter displays: one framed photo on the nightstand, or a small digital picture frame on a dresser. The kitchen is the opposite. It's a busy, high-traffic area where a fridge display works harder than any wall art.
Put your best photos in the room you use most, where your eyes land every day.
Photo display ideas without frames
Frames aren't the only route, and for renters they're often the wrong one. Photo display ideas without frames skip nails, hooks, and damage deposits entirely.
Here's how we'd rank the options:
- Fridge magnets: instant, repositionable, zero installation
- Clip strings: a taut wire with small clips, hung with removable hooks
- Leaning shelves: photos propped against the wall on a picture ledge
- Magnetic boards: a steel board on a desk or wall holds prints and notes
- Photo albums: a coffee-table album for the overflow shots
- Locker and office boards: steel surfaces hold magnets anywhere
The fridge wins for most apartments because it's already a high-traffic viewing area and needs no mounting at all.

How to make a photo gallery wall in a small space
A photo gallery wall works in a small apartment if you scale it down and plan it on the floor first. A tight grid of six small frames reads better in a narrow room than three oversized ones.
Follow this sequence:
- Choose a theme. Pick one thread: a single trip, one year, or one color story.
- Cut paper templates. Trace each frame onto paper and tape the shapes to the wall.
- Live with it for a day. Move templates before you commit to a nail hole.
- Keep consistent spacing. Two to three inches between frames looks deliberate.
- Anchor to furniture. Center the group above a sofa or console, not floating alone.
- Hang with removable strips if your lease forbids nails.
For a renter-friendly version, swap frames for a magnetic board and arrange photo magnets in the same grid pattern. You get the gallery wall look with zero wall damage.
Photo magnets for fridge decor
Photo magnets are one of the easiest ways to show photos in a small space. They need no wall space, no tools, and no permission from your landlord.
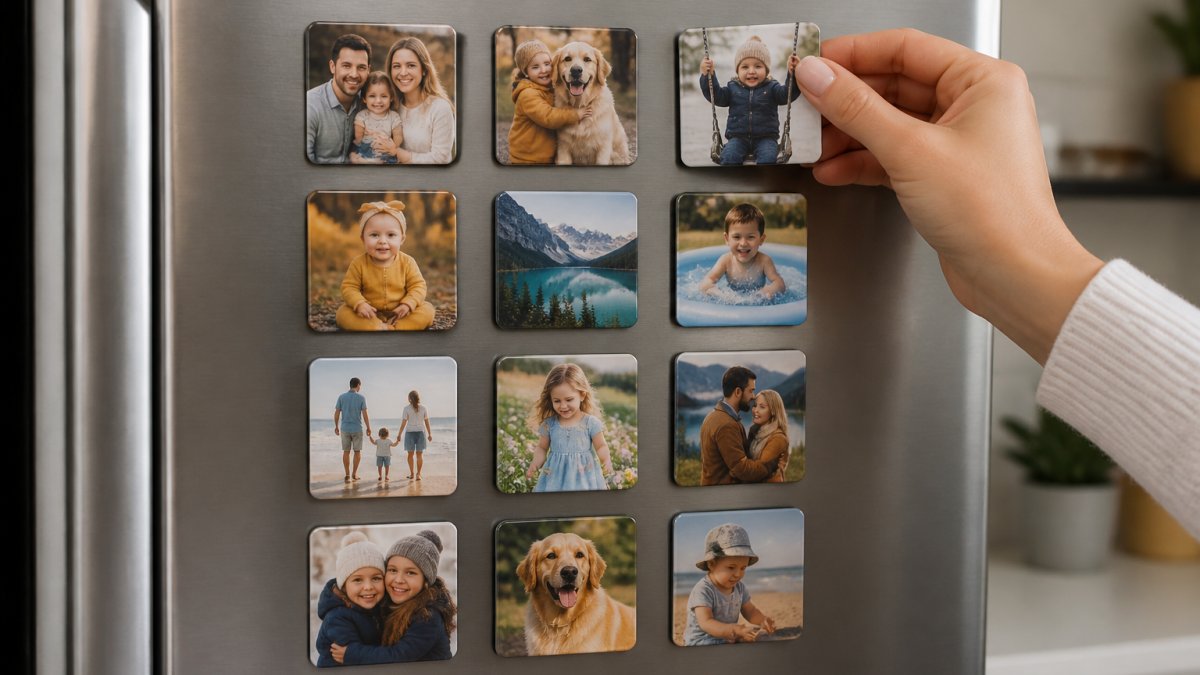
Our Custom Photo Fridge Magnets - Glossy Metal start at $3.99 for a single 2" x 2" magnet and turn a camera-roll photo into a glossy metal magnet. They come in sizes from 2" x 2" up to 2.5" x 3.5", so you can build a tidy grid or a loose cluster.
Want a more finished look? Our Plastic Magnet Photo Frames at $9.89 snap around a 2" x 2" magnet and add a clean black or white edge. A few together read like a mini gallery on the fridge door.
Custom Photo Fridge Magnets – Glossy Metal →

Orders ship in 3–5 business days, and orders over $50 ship free.
Digital photo frame ideas for small spaces
Digital photo frame ideas work best when you match screen size to viewing distance, then tune the screen for the room. In a small apartment you rarely stand more than a few feet from a frame, so a smaller screen can look sharper than a big one across the room.
As a rough guide, a 7- to 10-inch frame suits a countertop you pass up close, 10 to 12 inches works on a dresser seen from across a bedroom, and 12 to 15 inches suits a frame viewed from across a living room. Overshooting the size in a tight room makes the frame dominate the wall and adds glare surface area you have to manage.
Three placement rules keep a digital picture frame from feeling like clutter:
- Mind the glare. Keep the screen out of direct window light and off the axis of a lamp. Matte-finish screens and slight angling away from windows cut reflections; a frame facing a bright window will wash out at midday no matter the brightness setting.
- Set brightness to the room. Most frames ship at full brightness, which looks like a hallway TV in a dim bedroom. Drop it to roughly 40 to 60 percent for bedrooms and evening viewing, and use any auto-dimming or scheduled sleep setting so the screen isn't glowing at 2 a.m.
- Use a tabletop stand over wall mounting in rentals, and keep the cord short and tucked. A stand also lets you angle the screen away from glare without drilling.
For Wi-Fi setup, connect the frame to your home network and load a shared album so family can add photos remotely. Before you invite anyone in, check three things: whether the frame uses a per-frame account or a shared cloud album, who can add versus only view, and whether the frame exposes your library to the manufacturer's app or a public link. A common pattern is to create a dedicated album just for the frame rather than pointing it at your whole camera roll, and to remove guest access when you no longer need it.
A digital display is great for volume. A physical magnet display is better for the handful of photos you want to see every single day. Many small-apartment setups use both: a frame for rotation and a fridge or board for the daily favorites.
Renter-friendly mounting, cables, and setup
Renter-friendly installation comes down to three rules: no nails, no permanent adhesive, and no cable spaghetti. The specifics matter more than the rules, because the wrong strip or hook is what actually costs you a deposit.
Mounting without damage. Command Picture Hanging Strips are the common workhorse for frames and lightweight boards; match the strip rating to the item's weight and add a margin, since a frame rated at 3 pounds on a 5-pound strip is safer than one rated at 5. For heavier pieces, a single removable hook rated well above the frame's weight beats several small strips. Avoid cheap adhesive hooks on textured, freshly painted, or wallpapered walls, and always test one in a hidden spot first.
Cable routing. Run cords along the baseboard or behind furniture rather than across a wall. A short cord cover or a cable raceway hides the rest, and a cord clip keeps the slack from sagging. If you mount a frame, position it near an outlet so the cord drops straight down behind furniture instead of crossing open wall. For a tabletop frame, a short cord and a stand that hides the plug behind the screen is the cleanest look.
Power and energy over time. Physical prints and magnets are a one-time purchase. A digital frame draws a small but constant trickle of power, so check its rated energy use before you leave it running around the clock. A frame left on 24/7 at a few watts adds up over a year; using a scheduled sleep setting or a smart plug to turn it off overnight cuts that draw and extends the screen's life. Factor the upfront cost of the frame plus any cloud subscription against the one-time cost of prints and magnets, and decide which fits how often you actually rotate photos.
A repurposed tablet on a stand is another renter-friendly option: it needs no mounting, runs on Wi-Fi, and can show a rotating album, though you'll want to lock it down with a passcode and disable notifications so it doesn't double as a distraction.
Conclusion
The hardest part is choosing which photos to print and then getting them off your phone.
Magnet Stars turns camera-roll favorites into glossy metal magnets, with singles from $3.99, plastic frames at $9.89, and free shipping on orders over $50. Orders ship in 3–5 business days.
Start my order and give those hidden photos a permanent place to live.
Frequently asked questions
How can I display photos in a small apartment without putting holes in the wall?
Renters have several no-damage options. Magnetic surfaces are the easiest: a steel fridge, a filing cabinet, or a metal board holds photo magnets with zero hardware. Removable adhesive strips work for lightweight frames and come off cleanly when you move out. Leaning frames on a shelf, ledge, or mantel avoids nails entirely. Command-style hooks and tension rods also hold small prints. Save the drill for wall-mounted digital frames, and check your lease before making holes.
What are good photo display ideas without frames?
Skip the frame and use the photo itself. Print square prints and clip them to a string with mini clothespins. Tape a grid of prints directly to a painted wall with washi tape. Slide prints into a clear acrylic block or a floating ledge. Photo magnets on the fridge are the simplest option: order custom magnets from your phone, and they stick to any steel surface with no frame, nail, or adhesive needed. Rotate them seasonally so the display stays fresh.
How do I set up a digital photo frame in a small apartment?
Place the frame at eye level on a shelf or console, roughly 3 to 5 feet from where you sit, and tilt it slightly to reduce glare from windows. Connect it to your Wi-Fi during setup, then link a shared album so family can add photos remotely. Set brightness to match the room and enable a sleep schedule so the screen turns off at night. Keep the power cable routed behind furniture to hide the cord.
How many photos should I print for a small gallery wall?
Three to seven prints suit most apartment walls. Odd numbers look balanced, and a tight grid of 6 to 9 small square prints fills a narrow wall without crowding it. Measure the wall first, mark the layout with painter's tape, and keep 2 to 3 inches between frames. Mix sizes only if you have one clear anchor piece. Print a few extras so you can swap photos without reordering.